
Stepping into the world of fitness and supplements can feel like learning a new language. Amidst the jargon and endless options, the idea of using Whey Protein for Beginners often comes with a wave of questions and a touch of intimidation. You’re not just holding a tub of powder; you’re holding a list of uncertainties:
- “With so many brands and types, which one is right for me?”
- “What if I mix it wrong and end up with a gritty, clumpy mess?”
- “Do I need a blender? Is water okay, or what should I even mix this with?”
It’s completely normal to feel this way. The good news is that behind the complex labels and marketing, mastering the protein shake is incredibly simple. This guide is specifically designed to be the friendly, expert voice that cuts through the noise.
We’re going to walk with you, step-by-step, from nervously opening the tub to confidently enjoying your first shake. Consider this your straightforward roadmap to turning that intimidating powder into a delicious, satisfying, and powerful tool for your goals. Let’s transform Whey Protein for Beginners from a confusing concept into the easiest part of your new routine.
What Exactly is Whey Protein?
You can think of whey protein as the “gold standard” of protein—a pure, high-quality source that your body can use incredibly efficiently. But where does it actually come from?
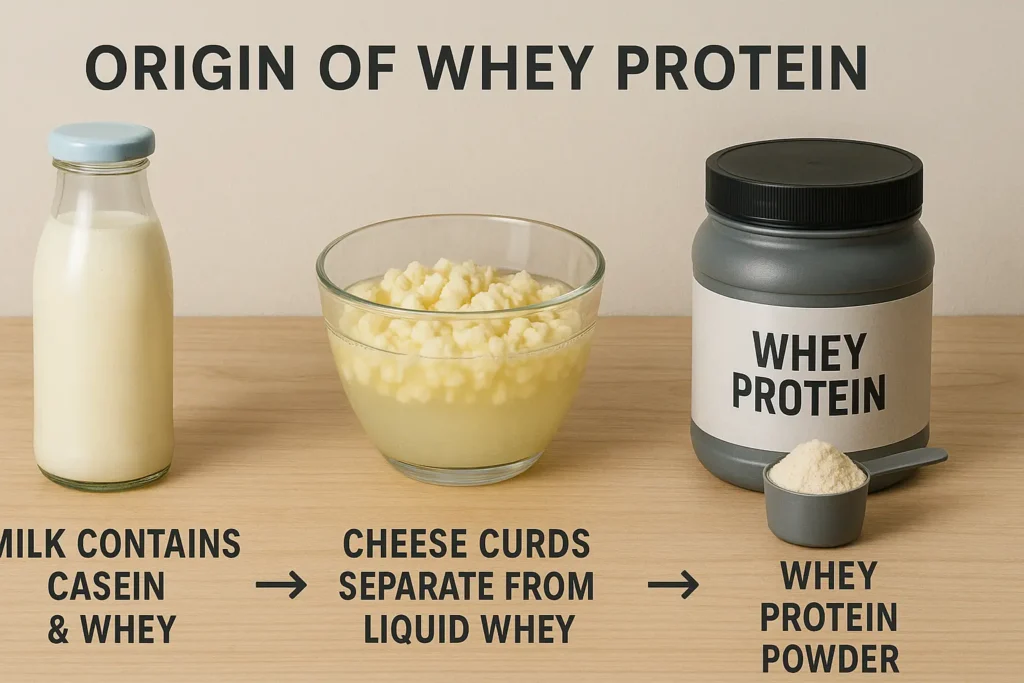
The story starts with milk. Milk contains two primary proteins: casein (about 80%) and whey (about 20%). When cheese is made, enzymes are added to milk, causing it to curdle. The solid curds are separated out to become cheese, and the leftover liquid is whey.
If you’ve ever opened a yogurt container and seen that thin, watery liquid on top—that’s whey in its most basic form! This liquid whey is then pasteurized and put through various filtration processes to remove most of the fat and lactose. What remains is dried into the powder we know as whey protein concentrate or isolate.
Why is it so special for your body?
Protein is made of smaller compounds called amino acids, often called the “building blocks of life.” Your body needs 20 different amino acids to build and repair tissues, from muscle fibers to your skin and hair.
Nine of these are “essential amino acids,” meaning your body cannot produce them on its own; you must get them from your diet. Whey protein is a “complete protein,” meaning it contains all nine of these essential amino acids in the right proportions. It’s particularly rich in three key Branched-Chain Amino Acids (BCAAs), with Leucine being the most notable for its powerful role in kick-starting muscle protein synthesis—the process of building new muscle.
So, while it’s not a magic potion, whey protein is an incredibly convenient and effective tool. It’s a quick-digesting, bioavailable protein that helps you meet your nutritional needs, support muscle recovery after a workout, and maintain a healthy, active body, especially when you’re on the go and a whole food meal isn’t practical.
What You’ll Need: Keeping It Simple
YoYou don’t need a gourmet kitchen or a cupboard full of fancy gadgets to make a great protein shake. In fact, you can get started with just two essential items. Here’s your straightforward beginner’s shopping list.
The Two Non-Negotiable Essentials
1. Whey Protein Powder: Your Foundation
- Our Recommendation for Beginners: Start with Whey Protein Concentrate.
- Why? It’s the most cost-effective option, but more importantly, it retains a bit more of the natural lactose and fat from the whey, which gives it a richer, more satisfying flavor compared to other types. This makes your first shake a delicious experience rather than a chalky chore.
- Flavor Advice: Stick to a classic like Chocolate or Vanilla for your first tub. These are universally-loved, versatile flavors that mix well with almost anything.
- What to Look For: Check the label. A good product will have “whey protein concentrate” as the first ingredient and a short, understandable list.
2. A Shaker Bottle: Your Mixing Machine
- Why It’s Essential: Trying to mix protein powder with a spoon in a glass is a guaranteed way to end up with a clumpy, unpleasant mess. A shaker bottle is non-negotiable for a perfectly smooth, lump-free shake every time.
- How It Works: These bottles come with a removable, perforated whisking ball (often called a “shaker ball” or “blender ball”). When you shake the bottle vigorously, this ball whips through the liquid, breaking up protein clumps instantly.
- Where to Find One: Any sports nutrition store, supermarket supplement aisle, or online retailer. They are incredibly affordable and often come with useful features like a wide mouth for easy cleaning or a compartment for storing your powder.
Optional (But Great) Upgrades & Accessories
Once you’ve mastered the basics, these accessories can enhance your shake experience:
A sprinkle of cinnamon or espresso powder.
A Small Blender: If you prefer a thicker, creamier, smoothie-like consistency, a simple personal blender is a fantastic upgrade. It’s perfect for incorporating frozen fruit, oats, or nut butter without any chunks.
Liquid Alternatives: While water is perfectly fine, using unsweetened almond milk, oat milk, or regular cow’s milk will make your shake creamier and more flavorful.
Flavor Boosters: Keep it simple at first, but later you can experiment with:
A tablespoon of peanut butter or cocoa powder.
A handful of frozen bananas or berries.
Your Step-by-Step Guide to the Perfect First Shake
Follow these simple, detailed steps, and you’ll have a perfectly smooth, delicious shake in under a minute. We’re breaking down every detail so you can mix with confidence.
The Visual Guide: The 4-Step Shake Method
(Image Idea: A horizontal infographic with four numbered circles, each showing a visual of the step: 1. Liquid in bottle, 2. Powder being scooped, 3. Hands shaking the bottle, 4. Someone drinking the shake.)
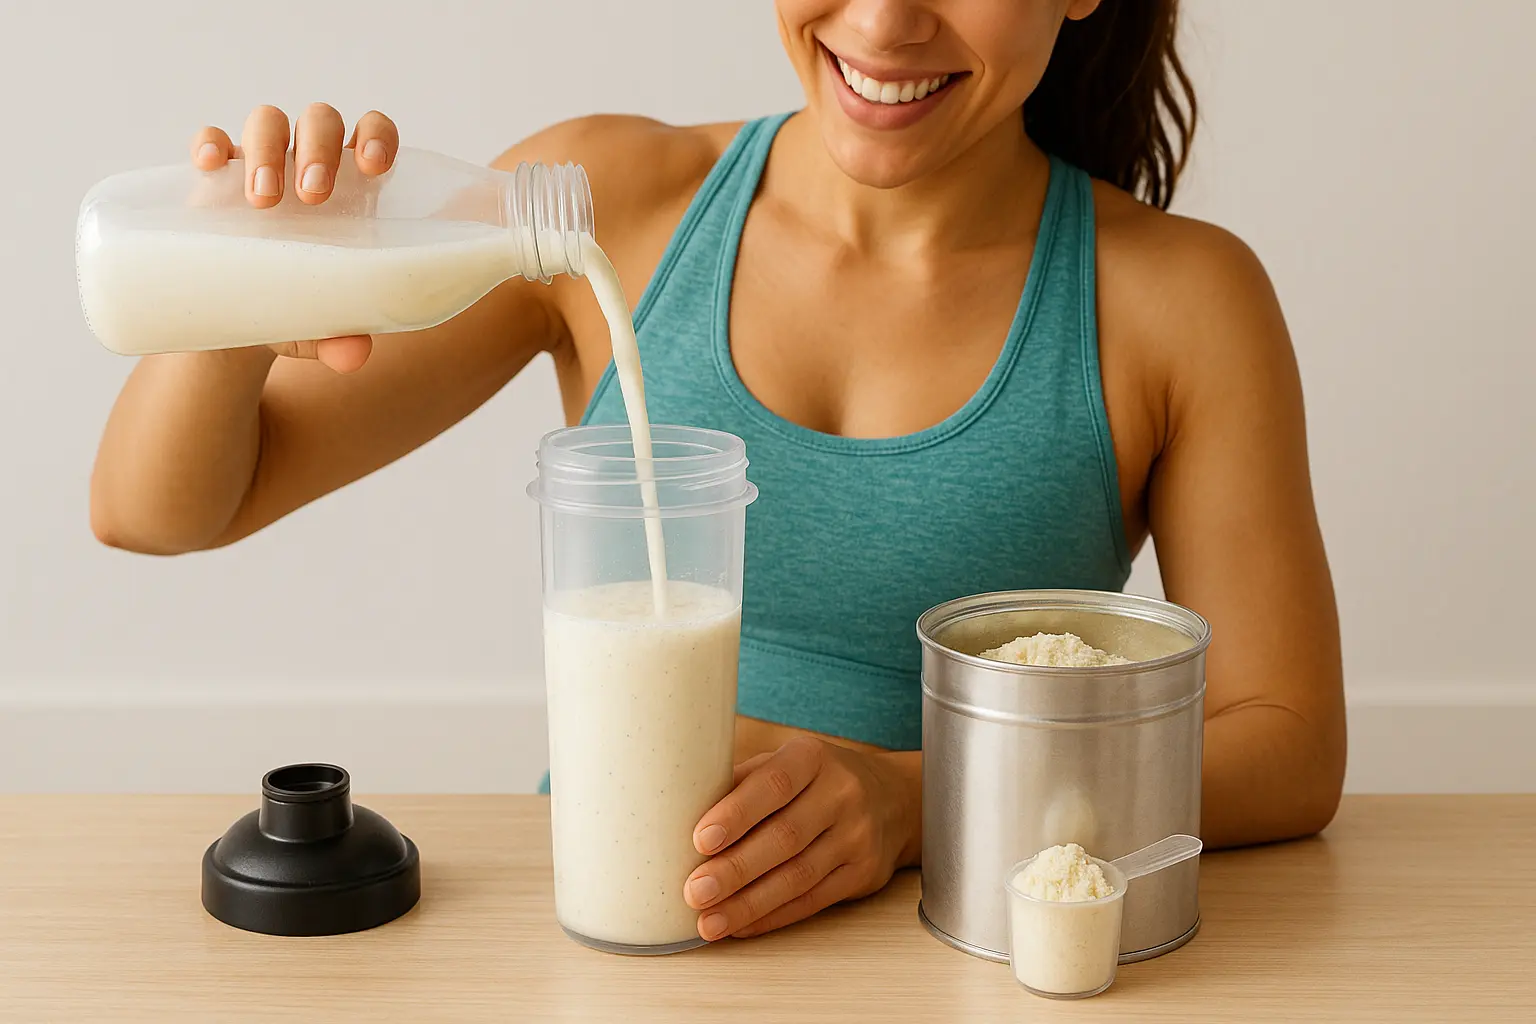
Step 1: The Liquid First – The Golden Rule
- The Action: Pour your chosen liquid into the empty shaker bottle first.
- Why This is Crucial: Adding the powder first is the most common beginner mistake. It causes the powder to instantly clump and stick to the bottom, creating a gritty, unmixable paste. Liquid first ensures every particle of powder gets hydrated evenly from the moment it hits the surface.
- Liquid of Choice (Detailed):
- Water (The Classic): Start with 8-10 oz (about 1 cup) of cold water. It’s calorie-free, simple, and lets the flavor of the protein shine through. Perfect for post-workout when you want quick absorption.
- Milk (The Creamy Upgrade): Using cold milk (dairy, almond, oat, etc.) creates a richer, creamier, and more satisfying shake, almost like a milkshake. It also adds extra protein and calories, making it great for a meal replacement.

Step 2: Add the Scoop – Precision Matters
- The Action: Using the scoop provided inside your protein tub, add one level scoop of powder. Do not pack the powder down into the scoop.
- Why It Matters: Protein companies calibrate their scoops to their specific powder’s density. Using a random tablespoon or a scoop from another brand can lead to incorrect serving sizes. A level scoop ensures you get the exact amount of protein you paid for and that the liquid-to-powder ratio is perfect for mixing.
Step 3: Shake It, Don’t Stir It! – Unleash the Power
- The Action: Secure the lid on your shaker bottle tightly. Double-check it! Now, shake it vigorously for 20-30 seconds. Hold the lid firmly and shake up and down and side-to-side.
- The Science Behind the Shake: This is where the magic happens. The metal whisk ball (or spiral blender) inside acts as a tiny, high-speed whisk. As it flies through the liquid, it shears the protein particles apart, incorporating air and eliminating lumps for a smooth, consistent texture. You’ll hear it working—that rattling sound is the sound of smoothness!
Step 4: Enjoy Immediately – Peak Freshness
Why the Rush? A freshly shaken protein shake has the best taste and texture. If left to sit, the protein can start to “settle” and thicken, and the foam created by shaking will dissipate. Think of it like a freshly poured soda—it’s best when it’s fresh and fizzy!
The Action: Open the cap and enjoy your shake right away.
Simple Recipe for Your First Shake
Now for the fun part! Here are a few simple, delicious recipes to get you started. We’ll begin with the absolute classic and then explore two easy upgrades. Each one uses the same foolproof Liquid-First Shaking Method.
1. The Classic Chocolate Shake
This is your no-fuss, guaranteed-to-please starting point. It’s simple, fast, and delicious.
Ingredients:
- 8 oz (1 cup) Cold Water or Milk (milk for creaminess)
- 1 Scoop Chocolate Whey Protein Powder
Instructions:
- Add the cold liquid to your shaker bottle first.
- Add one scoop of chocolate protein powder.
- Secure the lid tightly and shake vigorously for 30 seconds.
- Enjoy immediately!
Why You’ll Love It: It’s a quick and timeless chocolate treat that feels like an indulgence but fuels your body right.
2. The Vanilla Berry Blast
If you prefer a fruity flavor, this is your go-to. It’s light, refreshing, and packed with flavor.
Ingredients:
- 8 oz (1 cup) Cold Water or Unsweetened Almond Milk
- 1 Scoop Vanilla Whey Protein Powder
- ½ cup Frozen Mixed Berries (strawberries, blueberries, raspberries)
Instructions:
- Add the cold liquid to your shaker bottle.
- Add the scoop of vanilla protein powder and the frozen berries.
- Note: For a completely smooth shake with frozen fruit, a blender is highly recommended. If using a shaker, shake extra vigorously (45+ seconds) and expect a thicker, “smoothie-like” consistency with small berry pieces.
- Shake and enjoy!
Why You’ll Love It: The natural sweetness of the berries pairs perfectly with the vanilla, making it taste like a dessert smoothie.
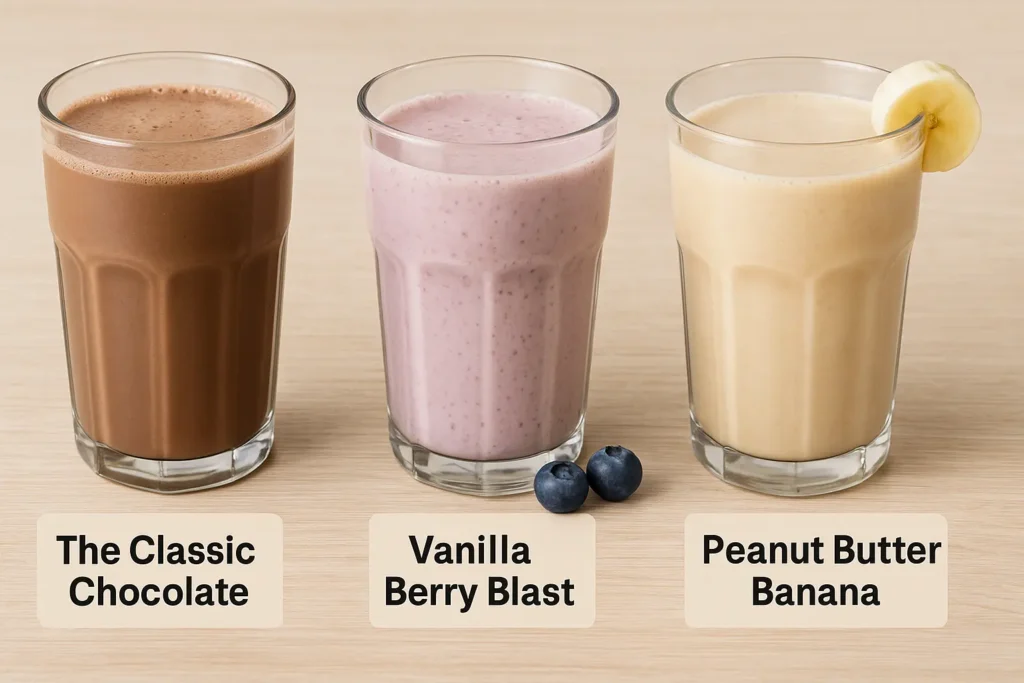
3. The Peanut Butter Banana Delight
This one is creamier, more filling, and tastes like a milkshake. Perfect for a satisfying snack.
Ingredients:
- 8 oz (1 cup) Cold Milk (dairy or oat milk work best)
- 1 Scoop Vanilla or Chocolate Whey Protein Powder
- ½ ripe Banana (preferably sliced and frozen for a thicker shake)
- 1 Tablespoon Natural Peanut Butter
Instructions:
- Add the cold milk to your shaker bottle.
- Add the protein powder, banana slices, and peanut butter.
- Note: This recipe works best in a blender to fully incorporate the banana and peanut butter into a smooth, creamy consistency. A shaker bottle will leave chunks.
- Blend (or shake as well as you can) until smooth.
Why You’ll Love It: It’s rich, satisfying, and combines classic flavors that feel like a real treat while keeping you full for hours.
Pro-Tip: For a thicker, ice-cream-like texture, always use frozen fruit instead of fresh!
When Should You Drink Your Shake?
Learning what not to do is just as important as knowing the right steps. Avoid these common pitfalls for a much better experience.
1. The Clumpy Mixing Method
- The Mistake: Trying to mix powder with a spoon in a regular cup or glass.
- The Result: A disgusting, lumpy mess that’s hard to drink and wastes product.
- The Fix: Invest in a shaker bottle. The built-in whisk ball is engineered specifically to create a vortex that breaks up clumps instantly. It’s a game-changer.
2. Adding Powder First (The Cardinal Sin)
- The Mistake: Dumping the powder into a dry shaker cup before adding liquid.
- The Result: The powder hydrates unevenly, cementing itself to the bottom and sides of the bottle, making it impossible to mix properly.
- The Fix: Liquid first, always. This is the golden rule of protein shakes.
3. Flavor Adventurism Too Early
- The Mistake: Buying an exotic flavor like “Mocha Caramel Craze” or “Birthday Cake” for your very first tub.
- The Result: If the flavoring is artificial or overly sweet, you might hate it and be stuck with a whole tub you won’t drink.
- The Fix: Start with the classics. Chocolate and vanilla are the most popular for a reason—they are consistently well-made, pleasant, and versatile for mixing with other ingredients.
4. Using Hot or Warm Liquid
- The Mistake: Thinking you can make a “hot protein coffee” or just using room-temperature water.
- The Result: Whey protein can denature (curdle) in heat, turning your shake into a gritty, lumpy, and unappetizing concoction. It also destroys the flavor.
- The Fix: Always use cold liquids. Not only does it prevent clumping, but it also makes the shake taste infinitely better.
5. Letting It Sit Too Long
- The Mistake: Making your shake and then leaving it in your bag or car for an hour before drinking it.
- The Result: The shake can separate, thicken into a gel-like consistency, and develop an “off” taste. It’s also a potential breeding ground for bacteria if made with milk.
- The Fix: Drink it immediately or within 20 minutes of shaking for the best taste and texture. If you must prep ahead, keep it refrigerated and consume it within a few hours.
The Bottom Line: Whey Protein for Beginners
Embarking on your fitness journey with whey protein is one of the smartest and most effective steps you can take. It’s not about complex science or overwhelming routines; it’s about giving your body the quality fuel it needs to recover, grow, and perform at its best.
As a beginner, you’ve now learned that the entire process boils down to a few simple, non-negotiable rules:
- The Golden Rule: Liquid first, always.
- The Tool: A shaker bottle is your essential ally against clumps.
- The Foundation: Start with a classic whey protein concentrate in chocolate or vanilla.
- The Timing: The post-workout window is your prime time for results.
You have the knowledge to bypass the common frustrations and mix a perfect, smooth, and delicious shake from day one. This isn’t a complicated ritual—it’s a simple, 60-second habit that pays off in spades for your energy, your muscles, and your overall health.
The door to easier nutrition and better results is open. You have your guide. Now, the only thing left to do is take that first step.
Your shaker is waiting. Here’s to that first delicious, satisfying sip, and to the stronger, healthier you that’s on the horizon.
Ressources
Scientific & Health Information
- National Institutes of Health (NIH) – Protein
- Link: https://ods.od.nih.gov/factsheets/Protein-HealthProfessional/
- A comprehensive overview of protein’s role in human health, including recommended intakes.
- International Society of Sports Nutrition (ISSN) – Protein & Exercise
- Link: https://jissn.biomedcentral.com/articles/10.1186/s12970-017-0177-8
- A key position stand on protein timing, dosage, and its effects on muscle mass and performance.
- Harvard T.H. Chan School of Public Health – The Nutrition Source: Protein
- Link: https://www.hsph.harvard.edu/nutritionsource/what-should-you-eat/protein/
- A trusted resource explaining different protein sources and their place in a healthy diet.
Product Reviews & Trusted Brands
- Labdoor
- Link: https://labdoor.com/rankings/protein
- An independent company that tests supplements for label accuracy and product purity. Useful for checking a brand’s quality before you buy.
- ConsumerLab
- Link: https://www.consumerlab.com/
- Another independent testing group that provides reviews and ratings on health and nutrition products (requires subscription for full access).
Practical Tools & Calculators
- Bodybuilding.com – Protein Calculator
- Link: https://www.bodybuilding.com/fun/protein-calculator.html
- A simple tool to help you estimate your daily protein needs based on your weight and fitness goals.